Quick grilled pizza

octobre 09, 2017 Xaibiwork 0 Comments

                                         Quick grilled pizza

Ingredients:

  • 250 g strong bread flour
  • 2 teaspoons dried yeast
  • 1 teaspoon caster sugar
  • olive oil
  • 2 cloves of garlic
  • 1 x 400 g tin of chopped tomatoes
  • a few sprigs of fresh basil

Method:

  1. Mix the flour, yeast, sugar, 1 teaspoon of sea salt, 1 tablespoon of oil and 180ml to 200ml of tepid water.
  2. Knead to an elastic dough, then cover and leave to rise for 1 hour.
  3. Peel, chop and fry the garlic in 4 tablespoons of oil, then add the tomatoes, pick in the basil leaves, and season with salt and black pepper.
  4. Preheat a griddle pan or barbecue.
  5. Divide the dough into 4 balls, then roll each out. Brush one side of each with oil, then cook, oiled side down, for 2 to 4 minutes, or until the bottom looks cooked.
  6. Brush the raw side with oil and flip over and cook until golden. Top with the sauce and toppings of your choice.

0 commentaires:

Italian-style bakewell tart

octobre 09, 2017 Xaibiwork 0 Comments

                                             Italian-style bakewell tart

Ingredients:

  • 750 g ripe plums
  • 2 sprigs of fresh rosemary
  • 20 g icing sugar
  • 500 g all-butter shortcrust pastry
  • 30 g flaked almonds
  • FRANGIPANE
  • 200 g unsalted butter (at room temperature)
  • 200 g golden caster sugar
  • 4 large free-range eggs
  • 2 oranges
  • 2 lemons
  • 2 teaspoons almond extract
  • 200 g ground almonds
  • 40 g plain flour , plus extra for dusting
  • LIMONCELLO ICING
  • 75 g icing sugar
  • 25 ml limoncello

Method:

  1. Halve and destone the plums and place in a bowl. Strip in the rosemary leaves, sprinkle with the icing sugar and leave to macerate for half an hour.
  2. Meanwhile, make the frangipane. Cream the butter and caster sugar together, then beat in the eggs. Finely grate in the zest from the oranges and lemons and add the almond extract. Fold through the ground almonds and flour.
  3. Preheat the oven to 180ºC/350ºF/gas 4.
  4. Roll out the pastry on a floured surface to fit a 25cm x 35cm lined baking tray, going up the sides slightly. Bake in the middle of the oven for 15 minutes.
  5. Remove from the oven and lower the heat to 160ºC/310ºF/gas 2½.
  6. Spread the frangipane over the pastry and stud with the plums and flaked almonds. Bake for 30 minutes, then allow to cool slightly.
  7. Combine the icing ingredients in a bowl and mix until smooth. Drizzle over the cooled tart, then serve.

0 commentaires:

Aubergine parmigiana with crispy breadcrumbs

octobre 09, 2017 Xaibiwork 0 Comments

                                      Aubergine parmigiana with crispy breadcrumbs

Ingredients:


  • 2 small courgettes
  • 1 small aubergine
  • 1 bunch of fresh basil , 15g
  • 1 clove of garlic
  • olive oil
  • 1 x 400 g tin of tomatoes
  • 75 g mozzarella cheese
  • 50 g dried breadcrumbs
  • 10 g Parmesan cheese
  • 1 lemon
  • extra virgin olive oil
  • 50 g rocket

Method:


  1. Preheat the grill to full whack and place a large tray on a shelf close to the heat.
  1. Trim the courgettes and aubergine, slice lengthways into ½ cm pieces, then place in a bowl. Sprinkle generously with sea salt and toss, then put aside.
  1. Pick the basil leaves, set aside and finely chop the stalks. Peel and finely chop the garlic.
  1. Heat ½ tablespoon of olive oil in a medium saucepan over a medium heat, add the garlic and basil stalks, then fry gently for 2 minutes before adding half the tomatoes (save the rest of another day) and the same volume of water. Cook for 10 minutes, or until it reaches a saucy consistency.
  1. Meanwhile, rinse the courgette and aubergine, then pat dry with kitchen roll. Tip back into a bowl and toss with 1 ½ tablespoons of olive oil, and a good pinch of seasoning.
  1. Spread the courgette and aubergine on the hot tray and slide under the heat (you may need to do this in batches, as you want the veg in one layer).
  1. Grill for 5 minutes, or until browned, then flip the veg grill for a further 5 minutes. Keep an eye on the veg as it grills, then tip into a bowl.
  1. Taste and season the sauce, then pour over the vegetables. Tear over the basil leaves and mix.
  1. Spread evenly on the tray and tear over the mozzarella. Sprinkle with breadcrumbs and grate over the Parmesan, then slide back under the grill. Grill until the cheese has melted.
  1. Meanwhile, squeeze half the lemon juice into a bowl, add 1 tablespoon of extra virgin olive oil and pinch of seasoning. Mix well, then toss through the rocket. When the parmigiana is bubbling and delicious, divide between plates and serve with the rocket.

0 commentaires:

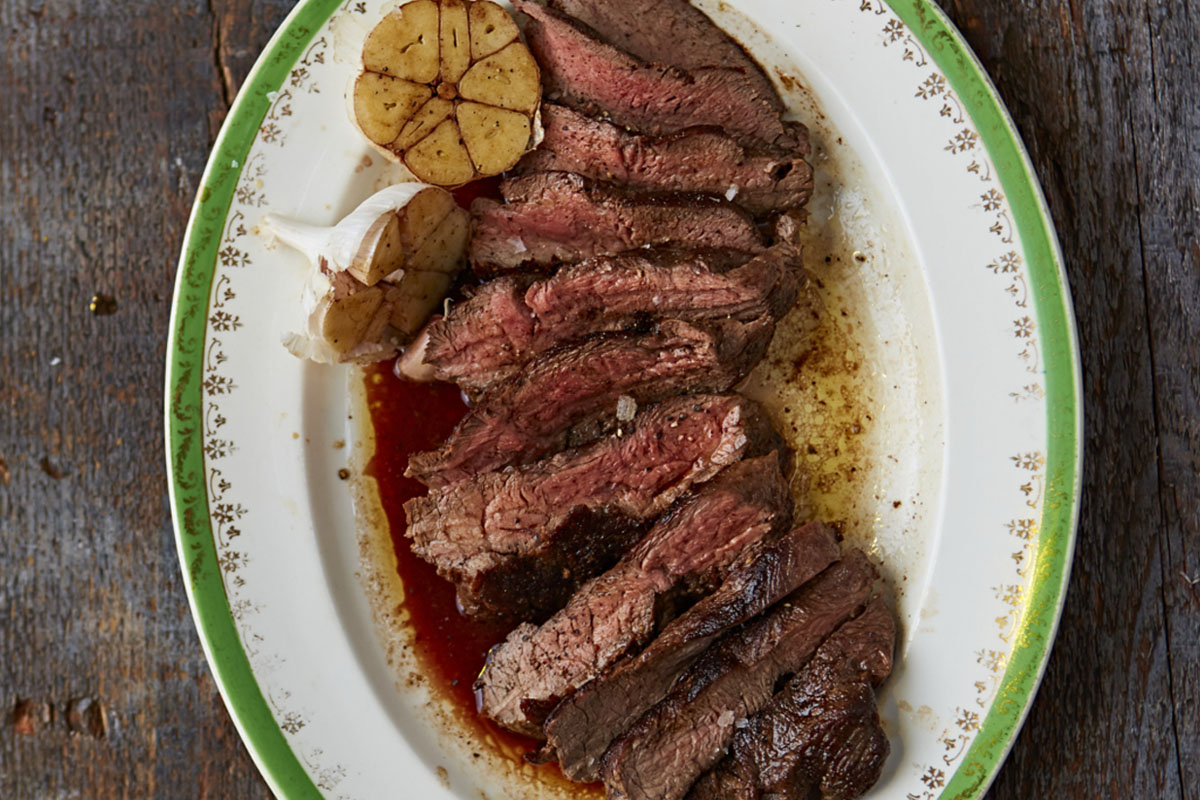
How to cook the perfect steak
octobre 08, 2017 Xaibiwork 0 Comments


If you’re cooking to impress and only a tender, juicy steak will cut it, don’t be fooled into spending a fortune.
Beyond the much-loved fillet, sirloin, rib-eye and rump, there’s a world of underrated, good-value steaks that will seriously deliver on the flavour front.
Flank skirt, thick skirt and thin skirt are all delicious and definitely worth a try, but here we’re focussing on Jamie’s favourite – feather steak (also known as flat iron steak). Full of beautiful flavour, texture and fat marbling, feather steak is a good size to leave you satisfied. Ask your butcher to remove the tough sinew right in the middle of it, and you’ll be ready to go.
But first, there are a few guidelines to bear in mind if you want to cook the perfect steak, whichever cut you choose.
Before you start, get the steak out of the fridge and allow it to come up to room temperature about one hour before cooking – frying or grilling it from cold will stop the heat from penetrating to the middle as efficiently. You also need to make sure your pan, griddle or barbecue is super hot before you begin – this will help to caramelise the meat, essential for a delicious crust.
During cooking, aim to cook your steak medium-rare to medium – any more and you’ll be left with a tough piece of meat. Turning it every minute or so will make sure you get a really even cook.
After cooking, leave it to rest and rub with a little extra virgin olive oil or butter for an incredible, juicy steak.
Remember these tips, and you’ll get great results every time. To make it even easier, follow these simple steps below.

HOW TO COOK THE PERFECT STEAK

Rub the steak all over with a good lug of olive oil and a good pinch of sea salt and black pepper
perfectsteak1

Add the steak to a hot pan, then cook for 6 minutes for medium-rare, or to your liking, turning every minute
perfectsteak2

For more flavour, try one or a combination of the following… 

Halve a garlic clove and rub it over the steak every time you turn it
perfectsteak3

Rub the steak with a knob of butter – the sweetness from the butter will make it taste divine!
perfectsteak5

Or create a herb brush by tying woody herbs like thyme or rosemary to the handle of a wooden spoon and brush it over the steak every minute or so
perfectsteak4

Once cooked to your liking, rest the steak on a plate that can collect all the lovely juices for 2 minutes
perfectsteak6

Carve with a nice sharp carving knife, then serve with the resting juices drizzled on top
perfectsteak7

Everyone has their favourite ways to eat steak – with good old chips and a crisp, green salad, with pepper or horseradish sauces, or even a simple fresh salsa verde to cut right through it. Whatever you choose, we’re sure your lucky guest will love you for it.
Dairy cows and beef cows are farmed differently. Usually, beef cows are raised for meat until they’re one or two years old. Meanwhile, dairy cows will be farmed for much longer while they continue to provide enough milk. However, once a dairy cow stops milking the meat is rarely eaten.
On the current series of Jamie & Jimmy’s Friday Night Feast, the boys are looking at using the overlooked meat from dairy cows, and seeing how we can reduce waste in the British beef industry.

0 commentaires:

Basic pizza

octobre 08, 2017 Xaibiwork 0 Comments


Ingredients:

  • 800 g strong white bread flour
  • 200 g fine ground semolina flour or strong white bread flour
  • 1 level tablespoon fine sea salt
  • 2x7 g sachets of dried yeast
  • 1 tablespoon golden caster sugar

Method:

  1. For the dough, pile the flours and 1 level teaspoon of sea salt onto a clean surface and make a well in the centre.
  2. Add the yeast and sugar to 650ml lukewarm water, mix together and leave for a few minutes, then pour into the well.
  3. Using a fork and a circular movement, slowly bring in the flour from the inner edge of the well and mix into the water. Continue to mix, bringing in all the flour – when the dough comes together and becomes too hard to mix with your fork, flour your hands and begin to pat it into a ball.
  4. Knead the dough by rolling it backwards and forwards, using your hands to stretch, pull and push the dough. Keep kneading for 10 minutes, or until you have a smooth, springy, soft dough.
  5. Place the dough in a lightly greased bowl, cover with clingfilm and leave in a warm place to to prove for 45 minutes, or until doubled in size.
  6. For the sauce, peel and finely slice the garlic, then pick the basil leaves and finely chop the stalks.
  7. Heat 1 tablespoon of oil in a pan on a medium-low heat, add the garlic and basil stalks, then cook gently for a couple of minutes, or until the garlic is lightly golden, then add most of the basil leaves, the tomatoes, and a pinch of salt and pepper.
  8. Leave the sauce to tick away for around 20 minutes, or until smooth, breaking up the tomatoes up with a wooden spoon. When the time’s up, taste, and season to perfection.
  9. To assemble the pizzas, divide the dough in half. Wrap one half in clingfilm and freeze for another day. With the remaining half, divide the dough into 4 equal balls.
  10. Flour each dough ball, then cover with clingfilm, and leave to rest for about 15 minutes – this will make them easier to roll it thinly.
  11. Dust a clean surface and the dough with a little flour or semolina, and roll it out into a rough circle, about ½cm thick.
  12. Tear off an appropriately sized piece of tin foil, rub it with olive oil, dust well with flour or semolina and place the pizza base on top. Continue doing the same with the remaining dough, dust with a little flour so you can pile them up. Cover with clingfilm and place in the fridge.
  13. When you're ready to cook them, preheat the oven to 250°C/500°F/gas 9.
  14. At this stage you can apply your topping: spread the tomato sauce over the base, spreading it out to the edges. Tear over the mozzarella and scatter with the remaining basil leaves. Drizzle with a tiny bit of olive oil and add a pinch of salt and pepper.
  15. If you can, cook the pizzas on a piece of granite in your conventional oven – if not, cook them one by one on pieces of tin foil directly on the bars of the oven shelf, towards the bottom of the oven (If you're going to cook your pizzas on the bars of the oven, make sure they're not too big – otherwise they'll be difficult to manoeuvre). Cook for 7 to 10 minutes, until the pizzas are golden and crispy.

0 commentaires:

Egg, prosciutto, artichokes, olives, mozzarella, tomato sauce and basil pizza topping

octobre 08, 2017 Xaibiwork 0 Comments


Ingredients

  • 6 tablespoons tomato sauce
  • 2 baby artichokes
  • 3 slices quality prosciutto
  • 1 small handful olives , stone removed
  • 1 small free-range egg
  • 50 g mozzarella
  • extra virgin olive oil
  • sea salt
  • freshly ground black pepper

Method

  1. Recipe for pizza dough and tomato sauce can be found here.
  2. Smear the tomato sauce evenly over the pizza base. Tear the artichokes into quarters and scatter over the pizza. Lay over the prosciutto slices and sprinkle the olives over. Crack over the egg and place little torn-up pieces of mozzarella in the gaps. Drizzle with extra virgin olive oil and season with pepper and a tiny bit of salt. Cook until crisp and golden.

0 commentaires:

Quick grilled pizza

octobre 08, 2017 Xaibiwork 0 Comments


Ingredients

  • 250 g strong bread flour
  • 2 teaspoons dried yeast
  • 1 teaspoon caster sugar
  • olive oil
  • 2 cloves of garlic
  • 1 x 400 g tin of chopped tomatoes
  • a few sprigs of fresh basil

Method

  1. Mix the flour, yeast, sugar, 1 teaspoon of sea salt, 1 tablespoon of oil and 180ml to 200ml of tepid water.
  2. Knead to an elastic dough, then cover and leave to rise for 1 hour.
  3. Peel, chop and fry the garlic in 4 tablespoons of oil, then add the tomatoes, pick in the basil leaves, and season with salt and black pepper.
  4. Preheat a griddle pan or barbecue.
  5. Divide the dough into 4 balls, then roll each out. Brush one side of each with oil, then cook, oiled side down, for 2 to 4 minutes, or until the bottom looks cooked.
  6. Brush the raw side with oil and flip over and cook until golden. Top with the sauce and toppings of your choice.

0 commentaires:

The best lasagna

octobre 08, 2017 Xaibiwork 0 Comments


Ingredients:


  • 1 pound sweet Italian sausage
  • 3/4 pound lean ground beef
  • 1/2 cup minced onion
  • 2 cloves garlic, crushed
  • 1 (28 ounce) can crushed tomatoes
  • 2 (6 ounce) cans tomato paste
  • 2 (6.5 ounce) cans canned tomato sauce
  • 1/2 cup water
  • 2 tablespoons white sugar
  • 1 1/2 teaspoons dried basil leaves
  • 1/2 teaspoon fennel seeds
  • 1 teaspoon Italian seasoning
  • 1 tablespoon salt
  • 1/4 teaspoon ground black pepper
  • 4 tablespoons chopped fresh parsley
  • 12 lasagna noodles
  • 16 ounces ricotta cheese
  • 1 egg
  • 1/2 teaspoon salt
  • 3/4 pound mozzarella cheese, sliced
  • 3/4 cup grated Parmesan cheese


   Method:

  1. In a Dutch oven, cook sausage, ground beef, onion, and garlic over medium heat until well browned. Stir in crushed tomatoes, tomato paste, tomato sauce, and water. Season with sugar, basil, fennel seeds, Italian seasoning, 1 tablespoon salt, pepper, and 2 tablespoons parsley. Simmer, covered, for about 1 1/2 hours, stirring occasionally.
  2. Bring a large pot of lightly salted water to a boil. Cook lasagna noodles in boiling water for 8 to 10 minutes. Drain noodles, and rinse with cold water. In a mixing bowl, combine ricotta cheese with egg, remaining parsley, and 1/2 teaspoon salt.
  3. Preheat oven to 375 degrees F (190 degrees C).
  4. To assemble, spread 1 1/2 cups of meat sauce in the bottom of a 9x13 inch baking dish. Arrange 6 noodles lengthwise over meat sauce. Spread with one half of the ricotta cheese mixture. Top with a third of mozzarella cheese slices. Spoon 1 1/2 cups meat sauce over mozzarella, and sprinkle with 1/4 cup Parmesan cheese. Repeat layers, and top with remaining mozzarella and Parmesan cheese. Cover with foil: to prevent sticking, either spray foil with cooking spray, or make sure the foil does not touch the cheese.
  5. Bake in preheated oven for 25 minutes. Remove foil, and bake an additional 25 minutes. Cool for 15 minutes before serving.

0 commentaires:

Print Print-16 Slow cooker pulled pork

octobre 08, 2017 Xaibiwork 0 Comments


Ingredients:


  • 2kg pork shoulder, skin removed
  • 1 onion, sliced
  • 2 tsp smoked paprika
  • ½ tsp cinnamon
  • 1 tbsp flour
  • 2 tsp oil
  • 4 garlic cloves, crushed
  • 160ml cloudy apple juice
  • 1 tbsp black treacle
  • 2 tbsp honey
  • 3 tbsp apple cider vinegar
  • 50g onion marmalade
  • 1 fennel bulb, sliced thinly
  • 1 apple, sliced thinly
  • juice 1 lemon
  • 8 - 10 bread rolls
  • English mustard
  • mayonnaise (optional)

Method:

1-Put the onion slices at the bottom of the slow cooker. In a small bowl mix together 1 tbsp salt with 1 tsp ground black pepper, the smoked paprika and cinnamon. Put the flour onto a plate then rub the spice mixture over the pork. Heat the oil in a large frying pan and roll the spiced pork in the flour before putting it into the pan to sear it on all sides (you may have to do this in batches). Once the meat is starting to pick up a golden colour pop it on top of the onion slices in the slow cooker.

2-In a large jug combine all the ingredients for slow cooking the pork then pour over the meat. Pop the lid on and cook on the low setting for 8hrs.

3-When you’re ready to serve, take the meat out of the slow cooker leaving the cooking liquor behind. Put the cooked meat on a roasting tray or large shallow bowl and pull it into bite-size chunks and shred with 2 forks. Ladle a little of the cooking juices over the pork and mix together.

4-Toss the fennel and apple slices in the lemon juice and season well then serve along with the pulled pork in bread rolls spread with a little English mustard and mayonnaise if you like.

0 commentaires:

Quick Mexican breakfast

octobre 07, 2017 Xaibiwork 0 Comments

                                      Quick Mexican breakfast

Method

  1. Make a fast and simple salsa by chopping the tomatoes, peppers and spring onions together on a big board.
  2. Squeeze over the juice from half a lime, drizzle with extra virgin olive oil and season, then use the knife to chop and mix it all together. Taste and add more lime juice if needed.
  3. Drain and pour the black beans into a small saucepan, season, drizzle with olive oil and heat through gently.
  4. Meanwhile, heat a frying pan, toast the tortillas one at a time on both sides until charred, then keep warm under a clean tea towel or foil.
  5. Fry the eggs in a little butter and oil, keeping the yolks nice and soft.
  6. Pop 2 tortillas on each plate and top with beans, salsa and an egg. Serve with salsa verde fresco for a bit of attitude.

Ingredients

  • 3 ripe tomatoes
  • 2 roasted red peppers from a jar
  • 4 spring onions
  • ½–1 lime
  • extra virgin olive oil
  • 1 x 400 g tin of black beans
  • olive oil
  • 8 small flour or corn tortillas
  • 4 large free-range eggs
  • 1 knob of butter

0 commentaires:

Shrimp & black bean quesadillas

octobre 07, 2017 Xaibiwork 0 Comments

                     Shrimp & black bean quesadillas


Ingredients

  • 200 g large raw prawns , from sustainable sources
  • 1 tablespoon smoked paprika
  • 1 tablespoon vegetable oil
  • 250 g mature cheddar cheese
  • 4 large flour tortillas
  • 400 g black beans
  • 4 tablespoons pickled jalapeños , plus extra to serve
  • 2 tablespoons coriander , plus extra to serve
  • sour cream and salsa , to serve
  • Method

    In a small bowl, toss the prawns with the smoked paprika and some salt and pepper. Heat a small frying pan with 1 teaspoon of the oil. Sear the prawns for 1 minute each side. Remove, let cool and halve lengthways. Set aside. 

    Spread half of the cheese over two tortillas. Drain the beans and roughly chop the jalapeños, then sprinkle over, along with the prawns. Finely chop the coriander, then divide between the tortillas, cover with the remaining cheese and top with the other tortillas. 

    Divide the rest of the oil between two frying pans and place them over a low–medium heat. Brown the tortillas on one side for 3 to 4 minutes, until the cheese is melted and golden, taking care not to let them burn. Turn them over and cook for 3 minutes. If the pan is looking a little dry, add another tiny drizzle of vegetable oil. 

    Once the cheese has melted, remove the quesadillas from the pan and cut each one into six triangles. Serve straight away, topped with a dollop of sour cream and salsa, the pickled jalapeños and coriander leaves


0 commentaires:

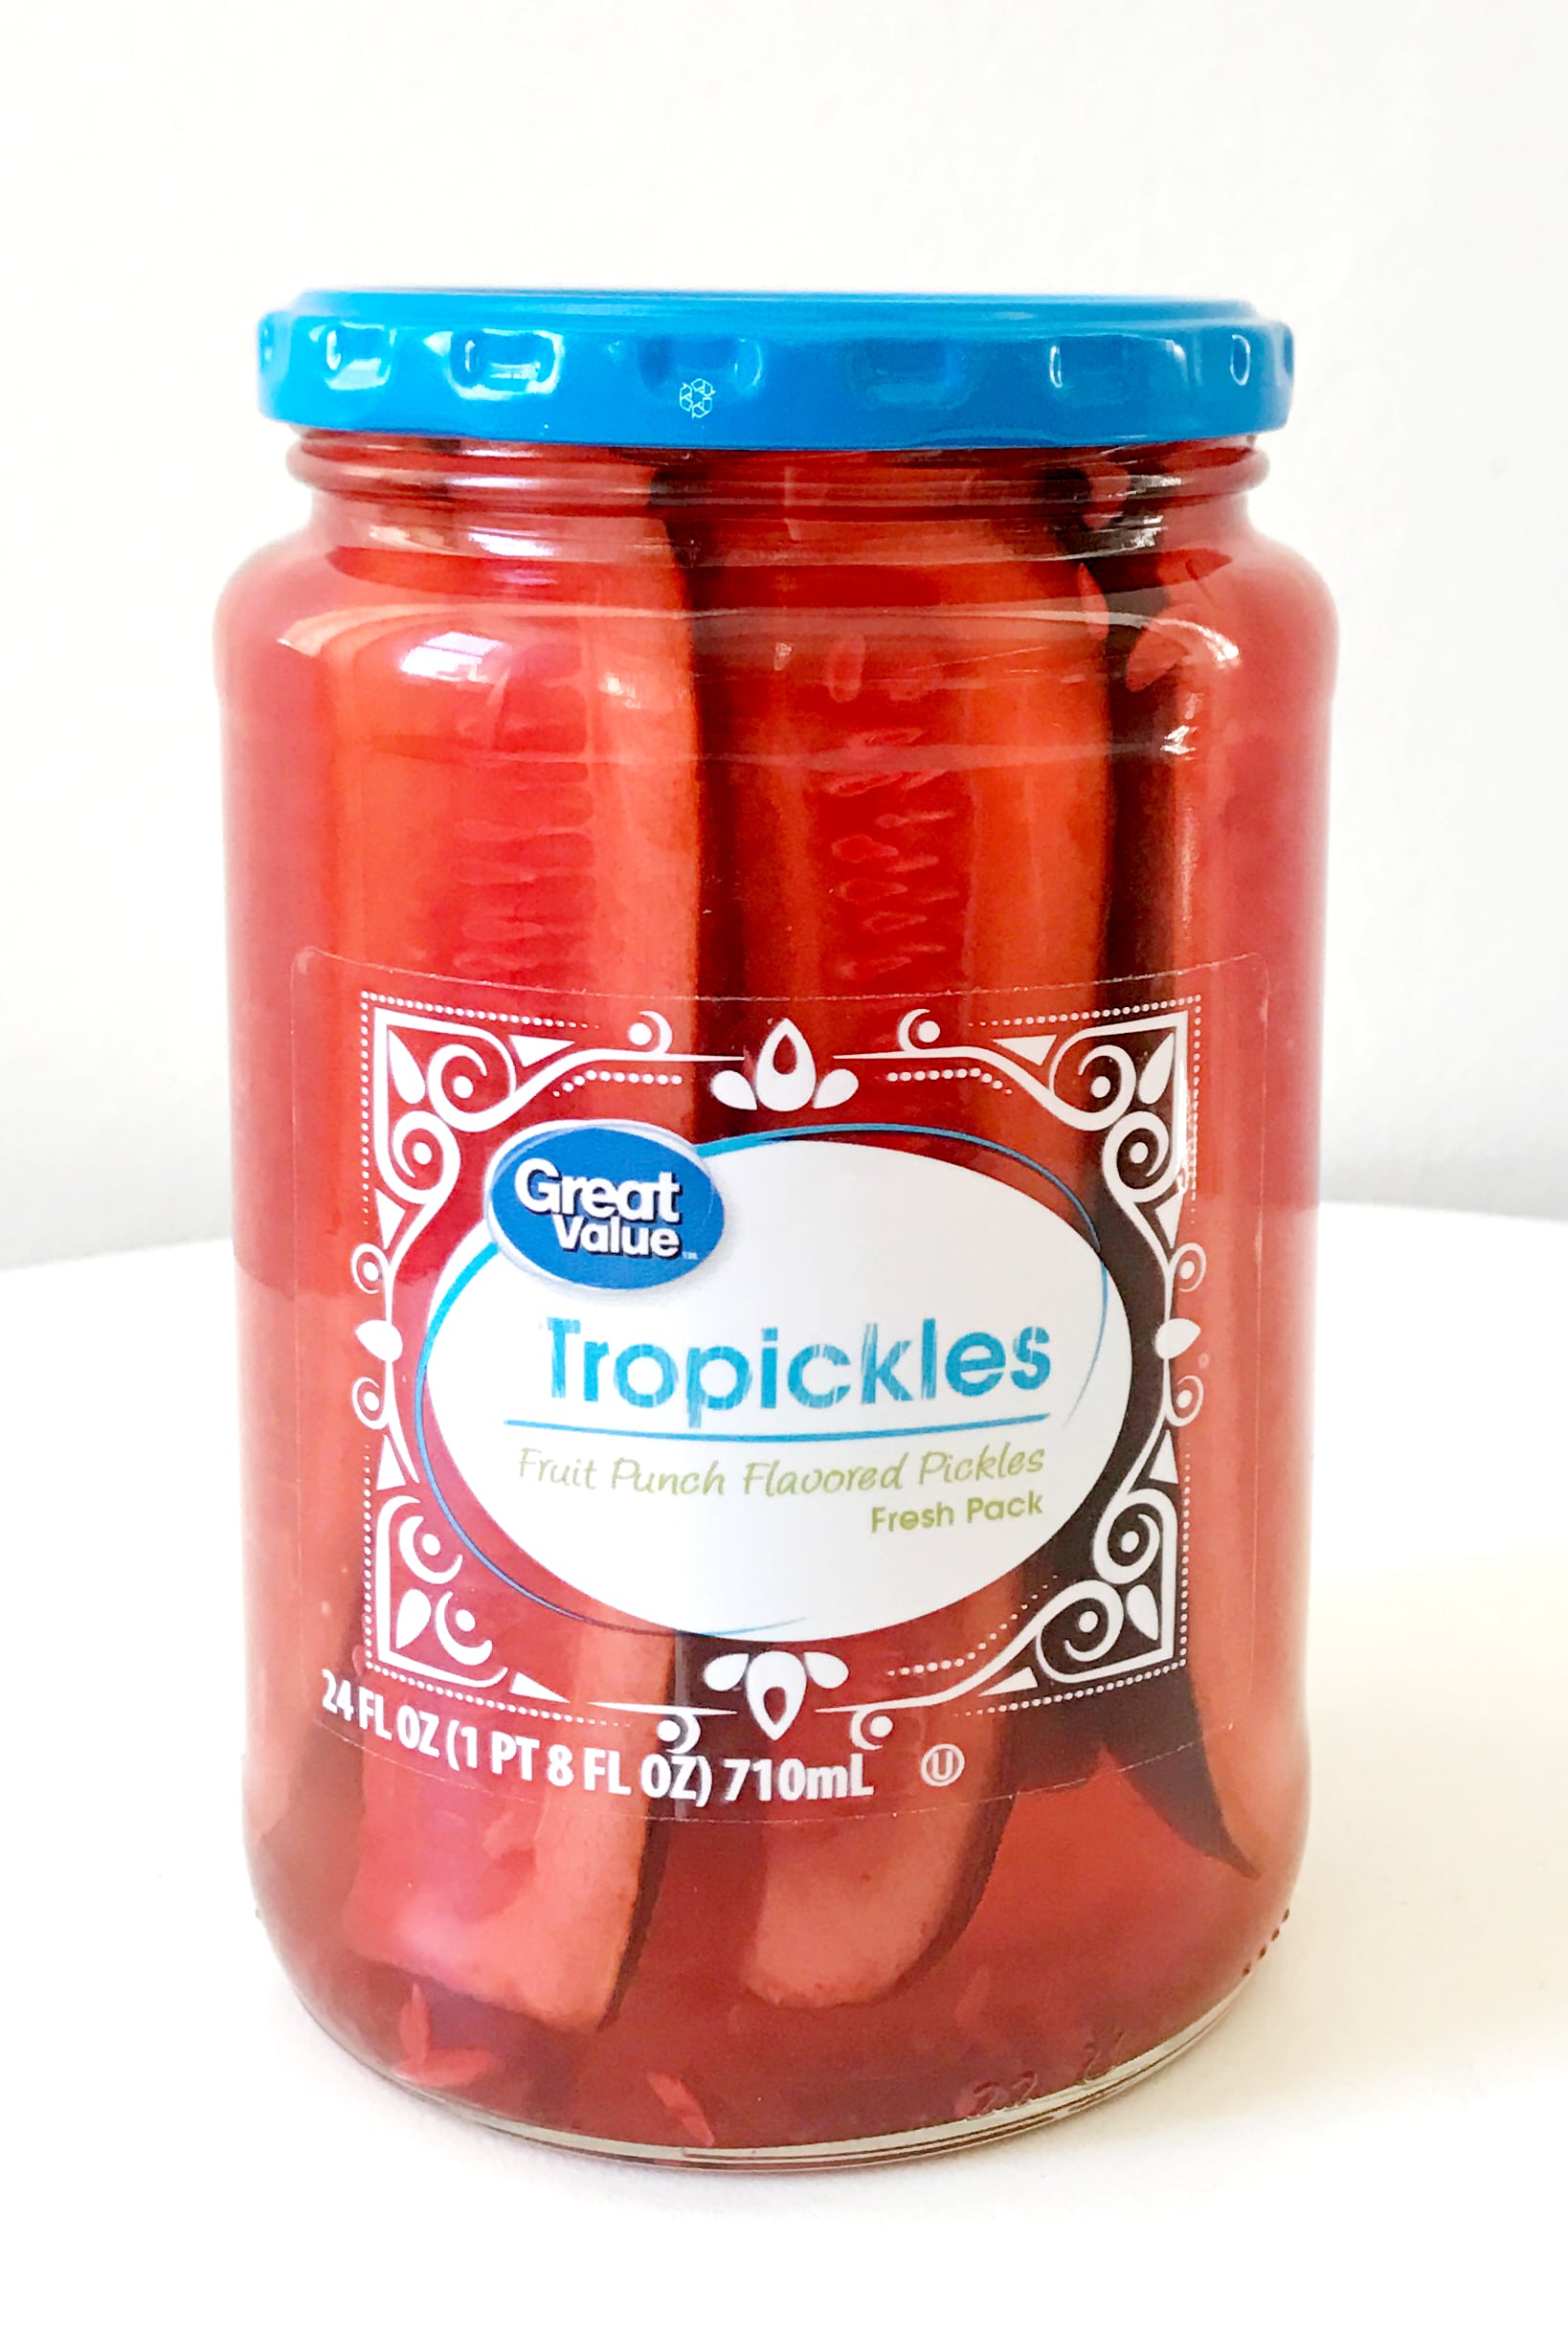
So Walmart Just Launched Tropickles, aka Fruit-Punch-Flavored Pickles

octobre 07, 2017 Xaibiwork 0 Comments


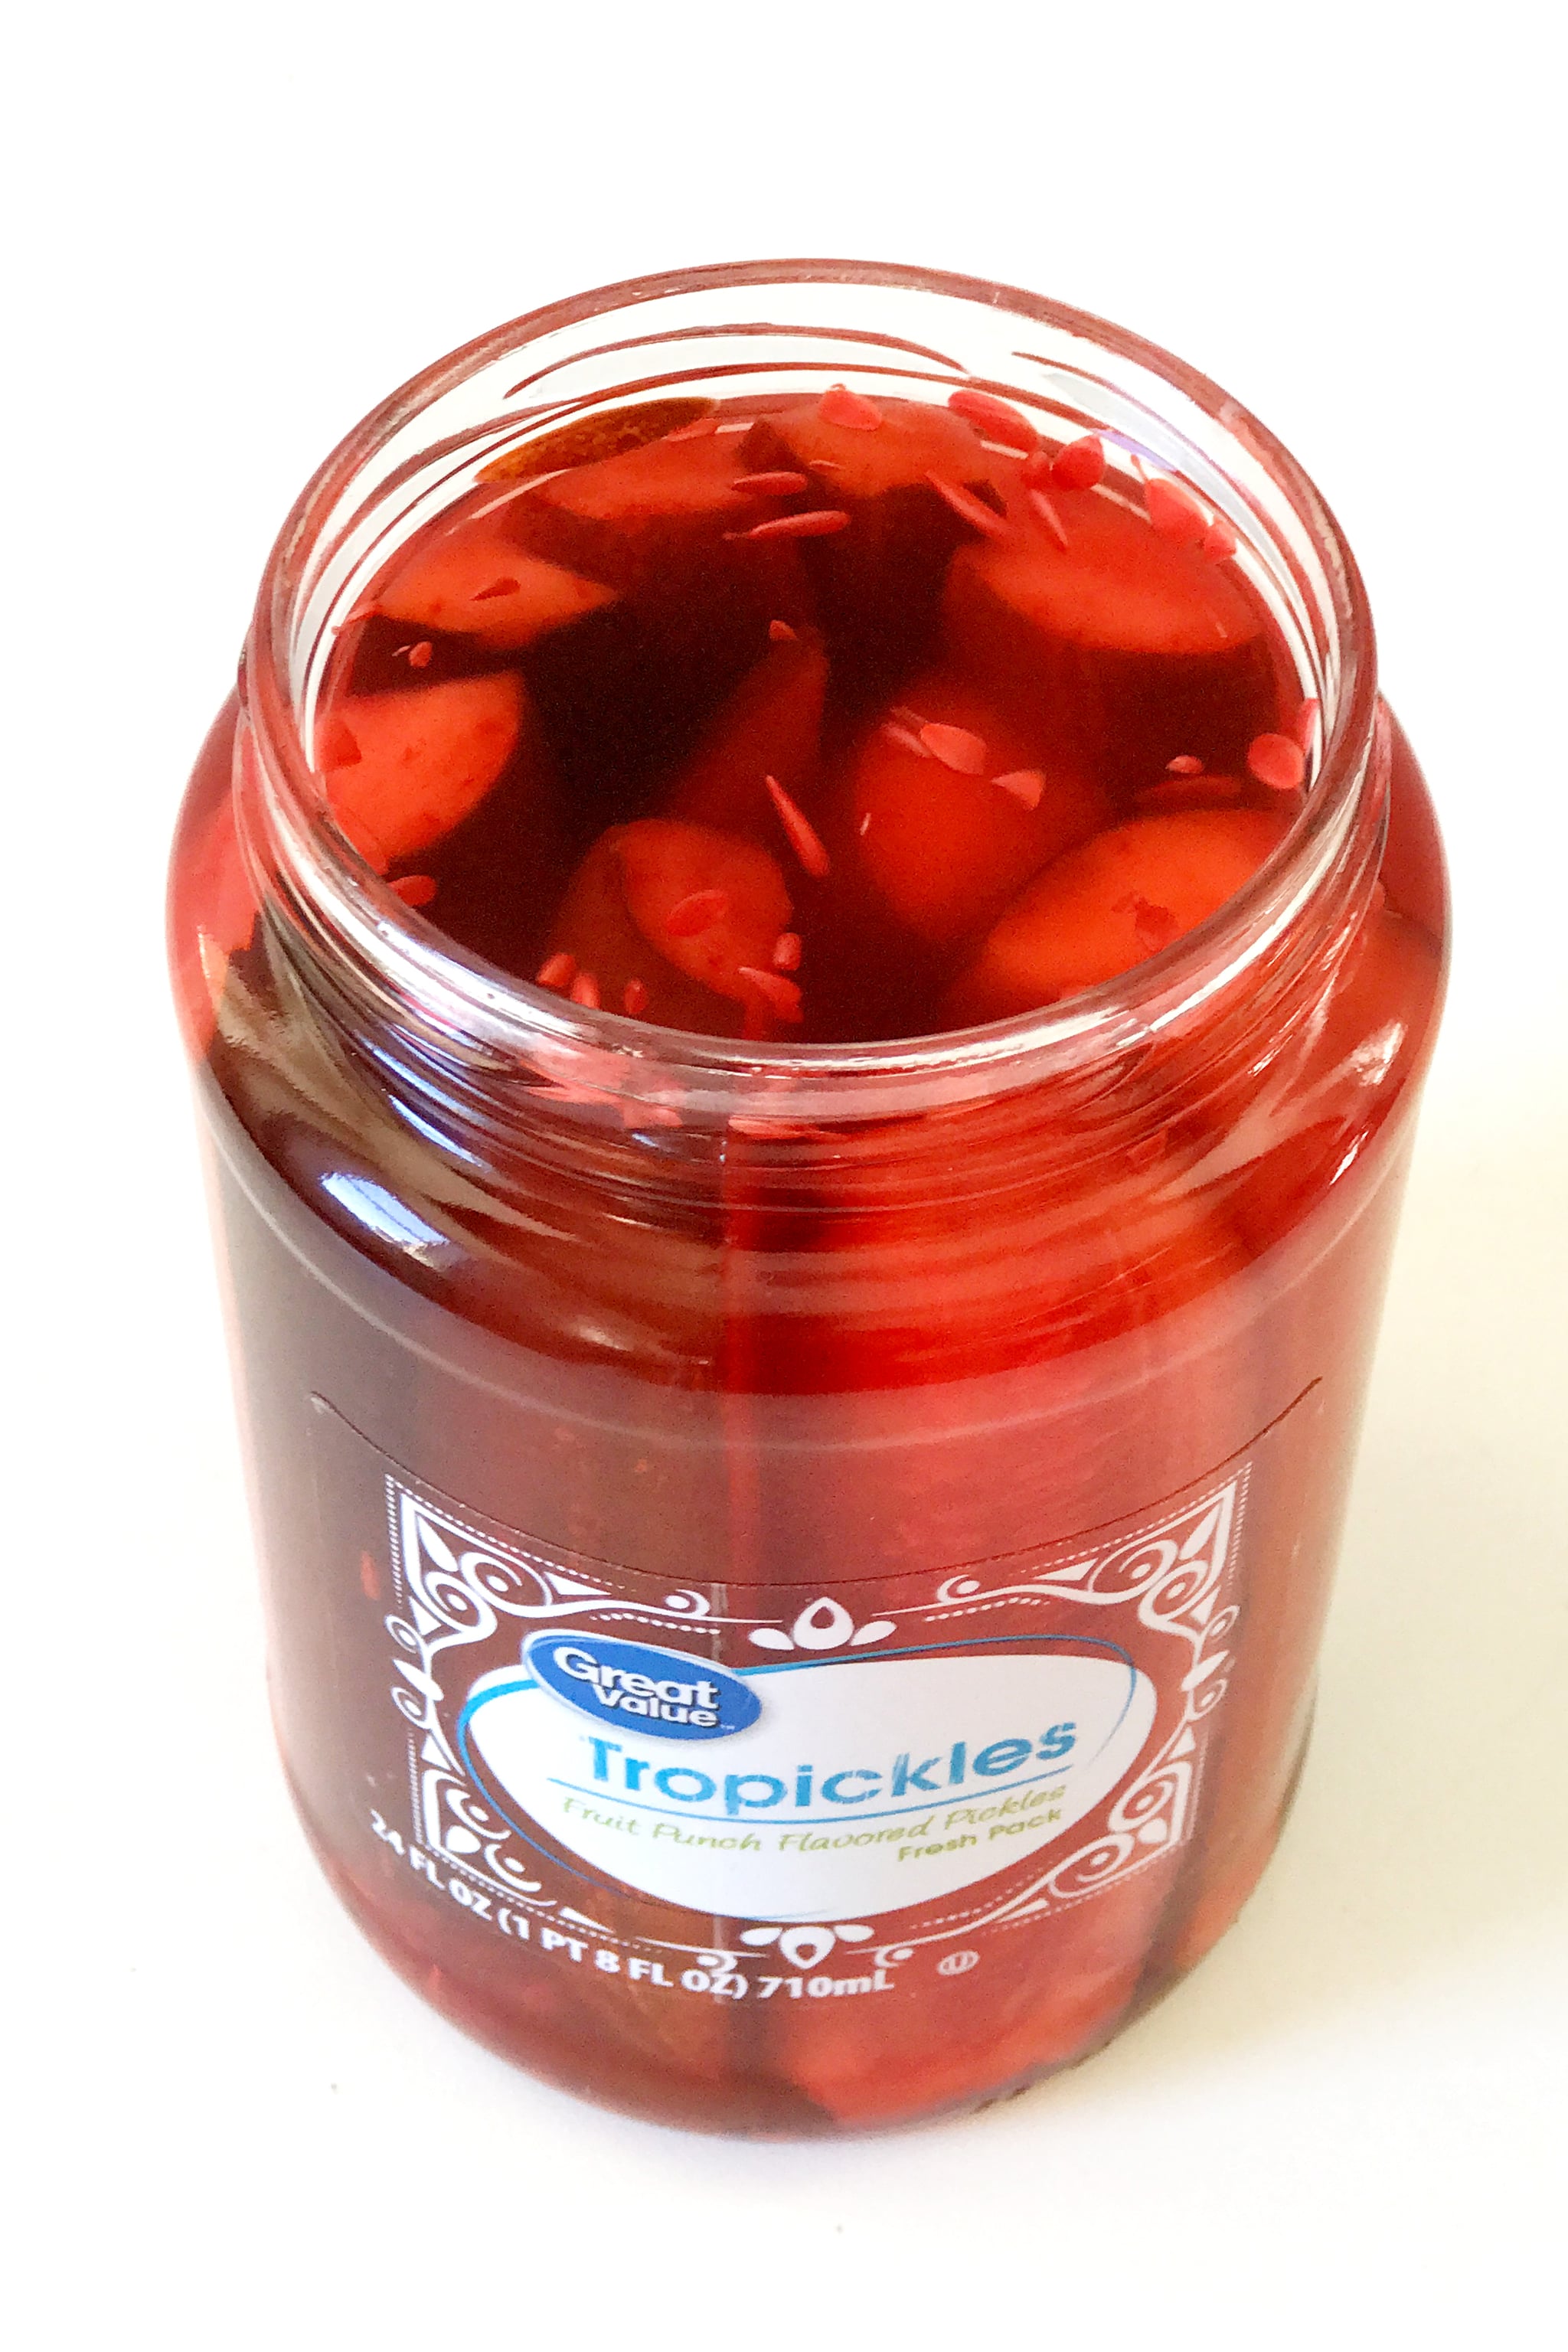
Brace yourself for this news, pickle-lovers. There's a new snack coming your way that's going to change the way you think about pickles and fruit punch. Tropickles, aka tropical-fruit-punch-flavored pickles — get it? — have just launched exclusively at Walmart under the Great Value brand. And they're exactly what they sound (and look) like: your standard jar of cucumber pickles with a not-so-standard color and flavor thanks to the red fruit punch that they're soaking in.
While Walmart is the first store to launch an official Tropickle product, the company's spokespeople admit they're not the first to think of the idea. People have been making different versions of fruit-punch pickles (like Kool-Aid pickles) for years, predominantly in the South. And Walmart claims to have learned of the idea through social media. In a statement, Walmart said, "The modern-day couple, the pickle and fruit punch met on social media (they bonded over recipes on Pinterest, to be exact); now, we are celebrating their union on Walmart store shelves." It makes sense that the jars of Tropickles ($2) are not available at all Walmart stores, but at a select 1,400 stores predominantly in the South.

For those of you who have yet to experience such a fruity pickle, here's a quick rundown of what to expect based on our own taste test. POPSUGAR tried the pickles ahead of the launch, and our editors can confirm that Tropickles taste just as equally sweet and tangy as you'd imagine. Less acidic and much more sugary than a regular pickle, the Tropickles' flavor hits your mouth all at once upon your first bite. The fruit punch makes them seem even juicier, and there's no shortage of a tropical aftertaste. If you're an adventurous eater who loves both salty pickles and sweet fruit punch, you just might be surprised by how much you love this unexpected combo.
These babies arrived on store shelves on July 14, so keep your eyes peeled the next time you're grocery shopping at Walmart.

0 commentaires:

8 Things You Never Knew About Krispy Kreme, Straight From an Insider Employee

octobre 07, 2017 Xaibiwork 0 Comments

Image associée
Knowing that Krispy Kreme makes some of the most irresistible and popular doughnuts in America, I spoke to an employee who gave me the inside scoop about the company. Besides the recipe for the iconic original glaze — I tried, but it's top secret! — here's what you might want to know about the American doughnut shop that's been around for almost 80 years.

The original location is still in Winston-Salem, NC.

"Krispy Kreme Doughnuts — and the Original Glazed® doughnut — have been around for nearly 80 years. The classic doughnut brand, founded in 1937, will celebrate its 80th birthday this July. Today, the company headquarters remain in Winston-Salem and Krispy Kreme has more than 1,300 shops in 31 countries around the world. Krispy Kreme doughnuts also can be found in approximately 12,000 grocery, convenience, and mass merchant stores throughout the United States."

And the origin story is pretty incredible.

"Krispy Kreme Doughnuts's founder Vernon Rudolph bought a secret yeast-raised doughnut recipe from a New Orleans French chef, rented a building in what is now historic Old Salem in Winston-Salem, NC, and began selling Krispy Kreme Doughnuts to local grocery stores. The delicious scent of cooking doughnuts drifted into the streets, and passersby stopped to ask if they could buy hot doughnuts. So, Rudolph cut a hole in an outside wall and started selling hot Original Glazed doughnuts directly to customers on the sidewalk."

There's a Hot Light app that tells you when the famous light is on.

"The Krispy Kreme Hot Light™, which was created in 1992 and has turned into an icon, is turned on whenever our signature Original Glazed doughnuts are being made. It signals that the doughnuts are hot and fresh coming off the line. We even have a Hot Light app that lets our customers know when our Original Glazed doughnuts are hot and fresh in their specific location."

There are unexpected menu items you might not have tried.

It's no surprise that the Original Glazed doughnut is the most popular Krispy Kreme order, but there are some unexpected menu items that you shouldn't overlook. "Krispy Kreme has dozens of doughnut menu items available at any given time – ranging from KREME™ filled varieties like the Chocolate-Iced with KREME filling, to premium treats such as the New York Cheesecake doughnut, to specialty holiday doughnuts, like the upcoming Fourth of July limited time offers."

Krispy Kreme goes through a LOT of chocolate icing.

"The average Krispy Kreme shop uses about 34,000 pounds of chocolate icing in a year, or about 2,800 pounds per month . . . and 2,500 pounds of sprinkles annually, or 210 pounds per month."

Krispy Kreme changed its coffee earlier this year.

"Earlier this year, the brand completely reinvented Krispy Kreme coffee from the bean to the cup. Our all-new coffee finally meets the delicious bar set by our doughnuts."

You can always look out for little ways to save money.

"Krispy Kreme has dozens (no pun intended) of promotions happening throughout the year. In fact, National Doughnut Day is June 2, and fans can celebrate their way by getting one free doughnut of their choice at participating shops." You can also join Krispy Kreme's E-Club to get a free doughnut on your birthday.

0 commentaires:

Paul’s passion fruit chicken

octobre 05, 2017 Xaibiwork 0 Comments


INGREDIENTS

For The Chicken
  • -1 tbsp olive oil
  • -1 tbsp jerk seasoning
  • -4 x 150g mini chicken fillets
  • -Whole Little Gem leaves, to serve
For The Dressing
  • -1 tbsp olive oil
  • -Pulp of 4 passion fruit
  • -Juice of 2 limes
  • -Sea salt and black pepper
  • -Pinch of stevia
For The Salsa
  • 1 -handful of coriander, chopped
  • 4- spring onions, finely chopped
  • 2 -red chillies, finely chopped
  • 4- tomatoes, deseeded and chopped

METHOD

  1. 1)Preheat the oven to 200C/Gas 6.
  2. 2)Blend together the olive oil and jerk seasoning and use this to marinate the chicken, coating it thoroughly, ideally for 1 hour (but I quite often rush it in 5 minutes).
  3. 3)Place on a baking tray and cook for 10-12 minutes until cooked through. Set aside to cool
  4. 4)Meanwhile, prepare the dressing by simply whisking together all the ingredients. Add the stevia last and only if you fancy a little sweetness as this will depend on how ripe your fruit is. Add it slowly, as too much can ruin it and you can’t take it out.
  5. 5)Now mix together all the ingredients for the salsa.
  6. 6)You can either tear up the chicken fillets into little shreds or just place them whole into little crispy lettuce leaves, top with some salsa and a little dressing.
  7. 7)Get messy and enjoy.

0 commentaires:

How to cook the perfect roast beef

octobre 05, 2017 Xaibiwork 0 Comments


INGREDIENTS

For the roast
  • -4kg rib of beef
  • -150ml vegetable oil
  • -3 onions, halved
For the beef jus
  • -120g beef trimmings
  • -1 tbsp oil, for cooking
  • -40g shallots, sliced
  • -1 thyme sprig
  • -½ bay leaf
  • -200ml good-quality veal jus (available online; 
at Claridge’s we make 
 our own)
  • -1 tsp cornflour, mixed 
with a splash of water (optional)
For the horseradish cream
  • -80g horseradish root, peeled and finely grated
  • -160ml double cream

METHOD


CREDIT: JOHN CAREY
  1. 1)Remove the beef from the refrigerator and let it come to room temperature.
  2. 2)Preheat the oven to 150C/gas mark 2.
  3. 3)Season the beef generously with salt and pepper and seal in the oil in a hot frying pan on all sides, until browned. Place the onion halves in a roasting tin and sit the beef on top. Roast for an hour and 40 minutes, or until the core temperature reaches 38C on a digital meat probe (which should be inserted into the thickest part of meat), then remove from the oven and leave to rest for an hour in a warm place while the internal temperature slowly rises to 54C – medium-rare. If you prefer your meat medium-well, cook to 48C, then rest while the temperature rises up to 65C.
  4. 4)While the beef is roasting, start the beef jus. In a sauté pan, colour the beef trimmings in the oil until well browned, then add the shallots and caramelise. Add the thyme and bay leaf, then the veal jus, and gently simmer for an hour.
  5. 5)For the horseradish cream, stir the horseradish into the cream, then add salt to taste and mix well. Leave to stand for at least 15 minutes to thicken. Keep cool, or refrigerate if it’s a warm day.
  6. 6)After removing the beef from the oven, increase the temperature to 220C/gas mark 7. Discard the onion and pour off most of the excess fat (dripping) from the roasting tin (you can use this for roast potatoes and Yorkshire puddings), reserving a little in the tin for flavour.
  7. 7)Next, strain the beef-jus base directly into the tin, discarding the trimmings, shallots and herbs. Over a medium heat on the hob, use a spatula to scrape off the roasting sediment on the base of the tin, and reduce the jus for 4-5 minutes. If the sauce seems too thin, add the cornflour-and-water paste to thicken slightly.
  8. 8)Carve the meat: it is best to use two knives, a long-bladed one for slicing and a short-bladed one for trimming and separating joints. Have a warm platter at the ready, and a pair of kitchen scissors. Allow elbow room at the table, and always stand, never sit. Carve uniform, attractive slices perpendicular to the grain of the meat, and serve with the beef jus and horseradish cream

0 commentaires: